TrustPayments
This guide will walk you through the process of integrating Trust Payments with NORBr.

Step 1: Contract signature
Sign a contract with Trustpayments, and get access to the back office.
Step 2: Get your site references
When you get your access to Trustpayments backoffice, you will get two site references assigned - you should receive them by email or otherwise you can find them in you Trustpayments backoffice.
- One site reference is for authorization
- The other one is for 3D Secure
- Log into your Trustpayments backoffice
- Navigate to sites
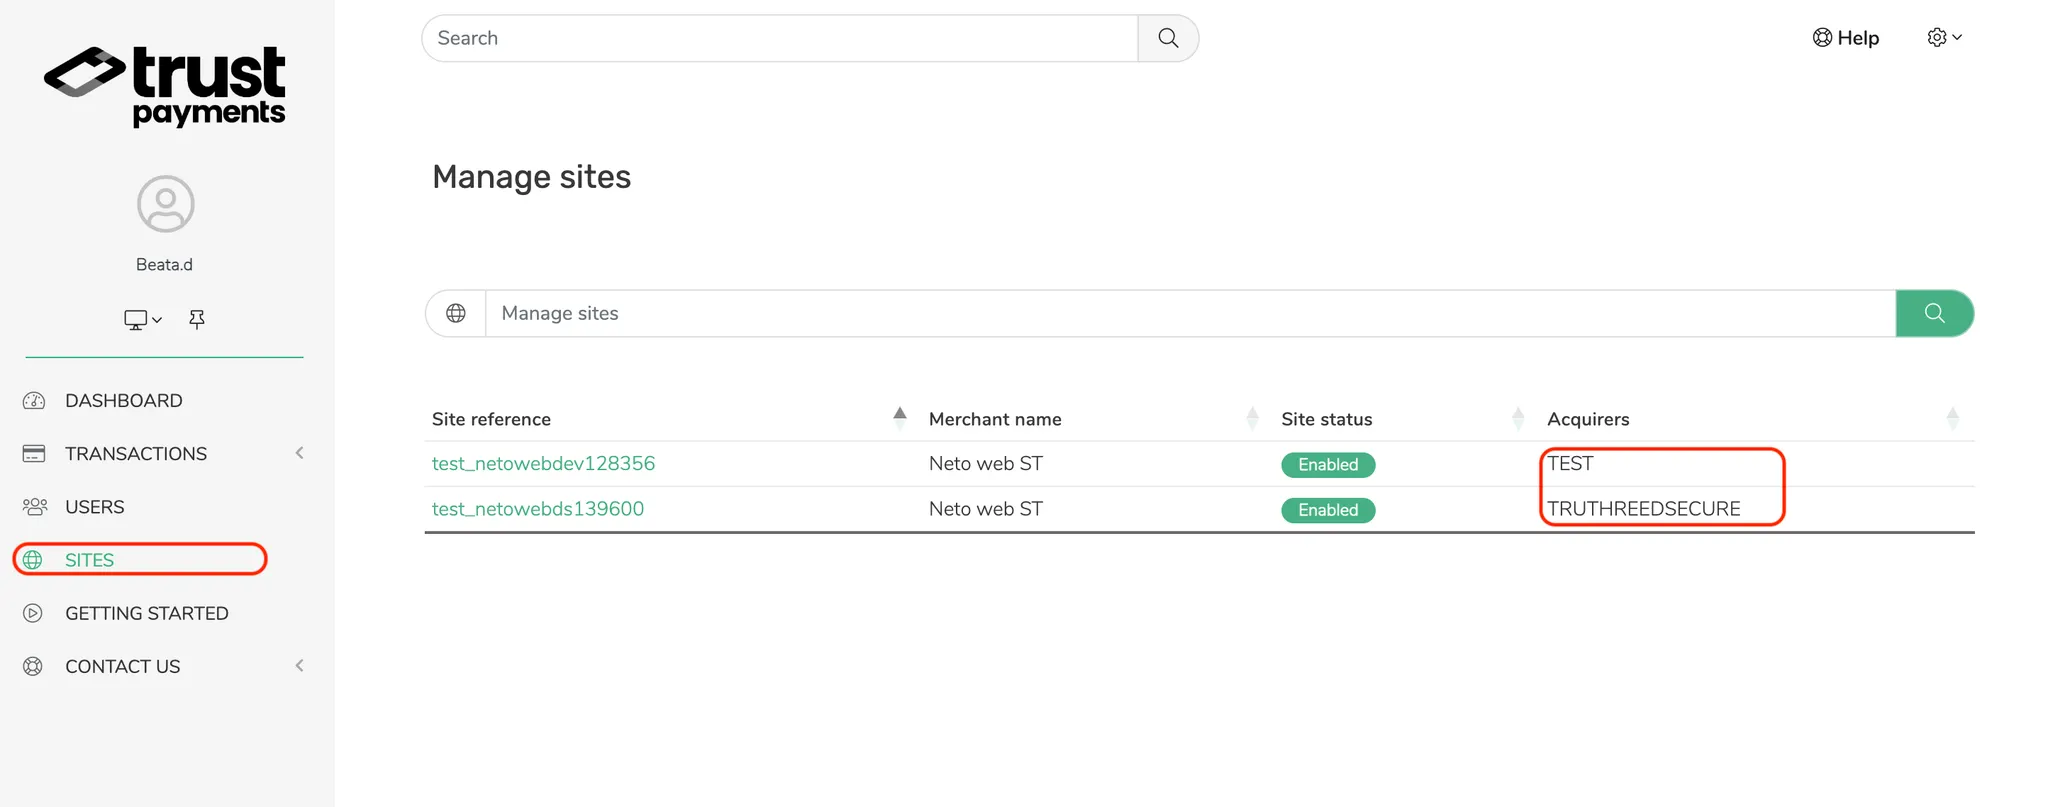
- Find your site reference - for authorization (TEST on the above screenshot) and for 3DS (TRUTHREEDSECURE on the above screenshot).
Step 3: Create a Webservice user
After checking your site references, you need to create a Webservice user and assign those site references to the user.
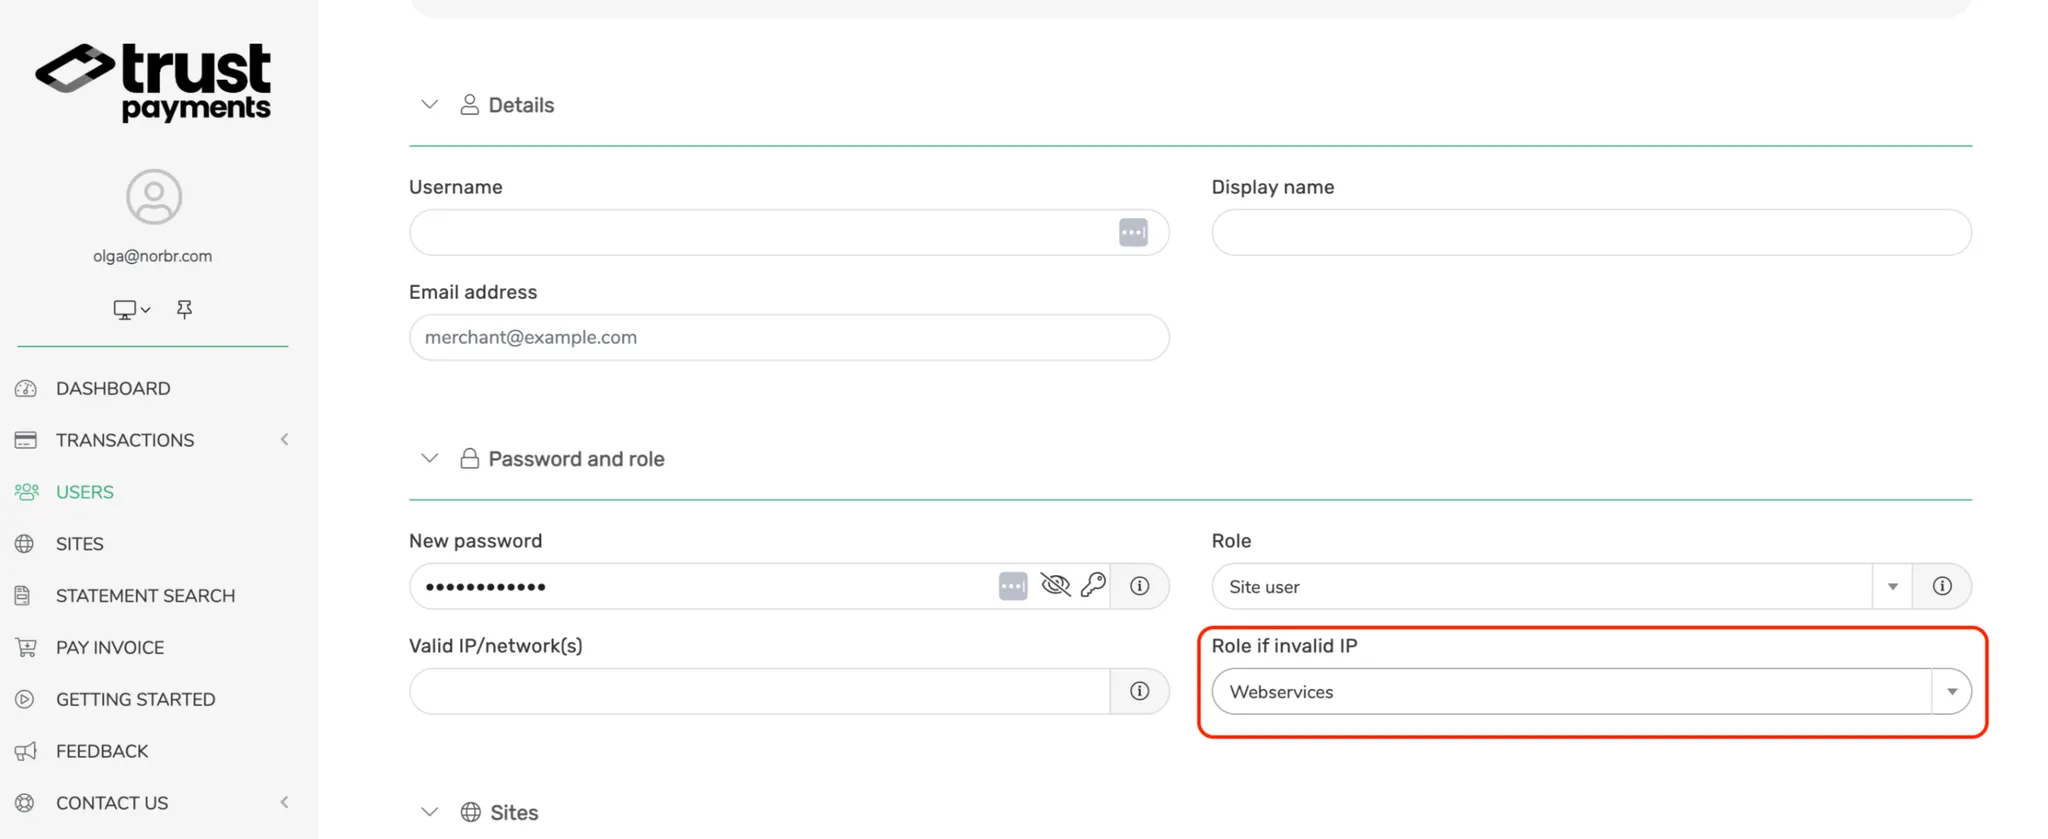
- In your Trustpayments backoffice, navigate to Users → Add a new user
- Make sure to select Webservices option in the Role if invalid IP section
- When adding records to Valid IP/network(s), divide each record by semicolon
- The username value you fill in, will be used later as a site alias
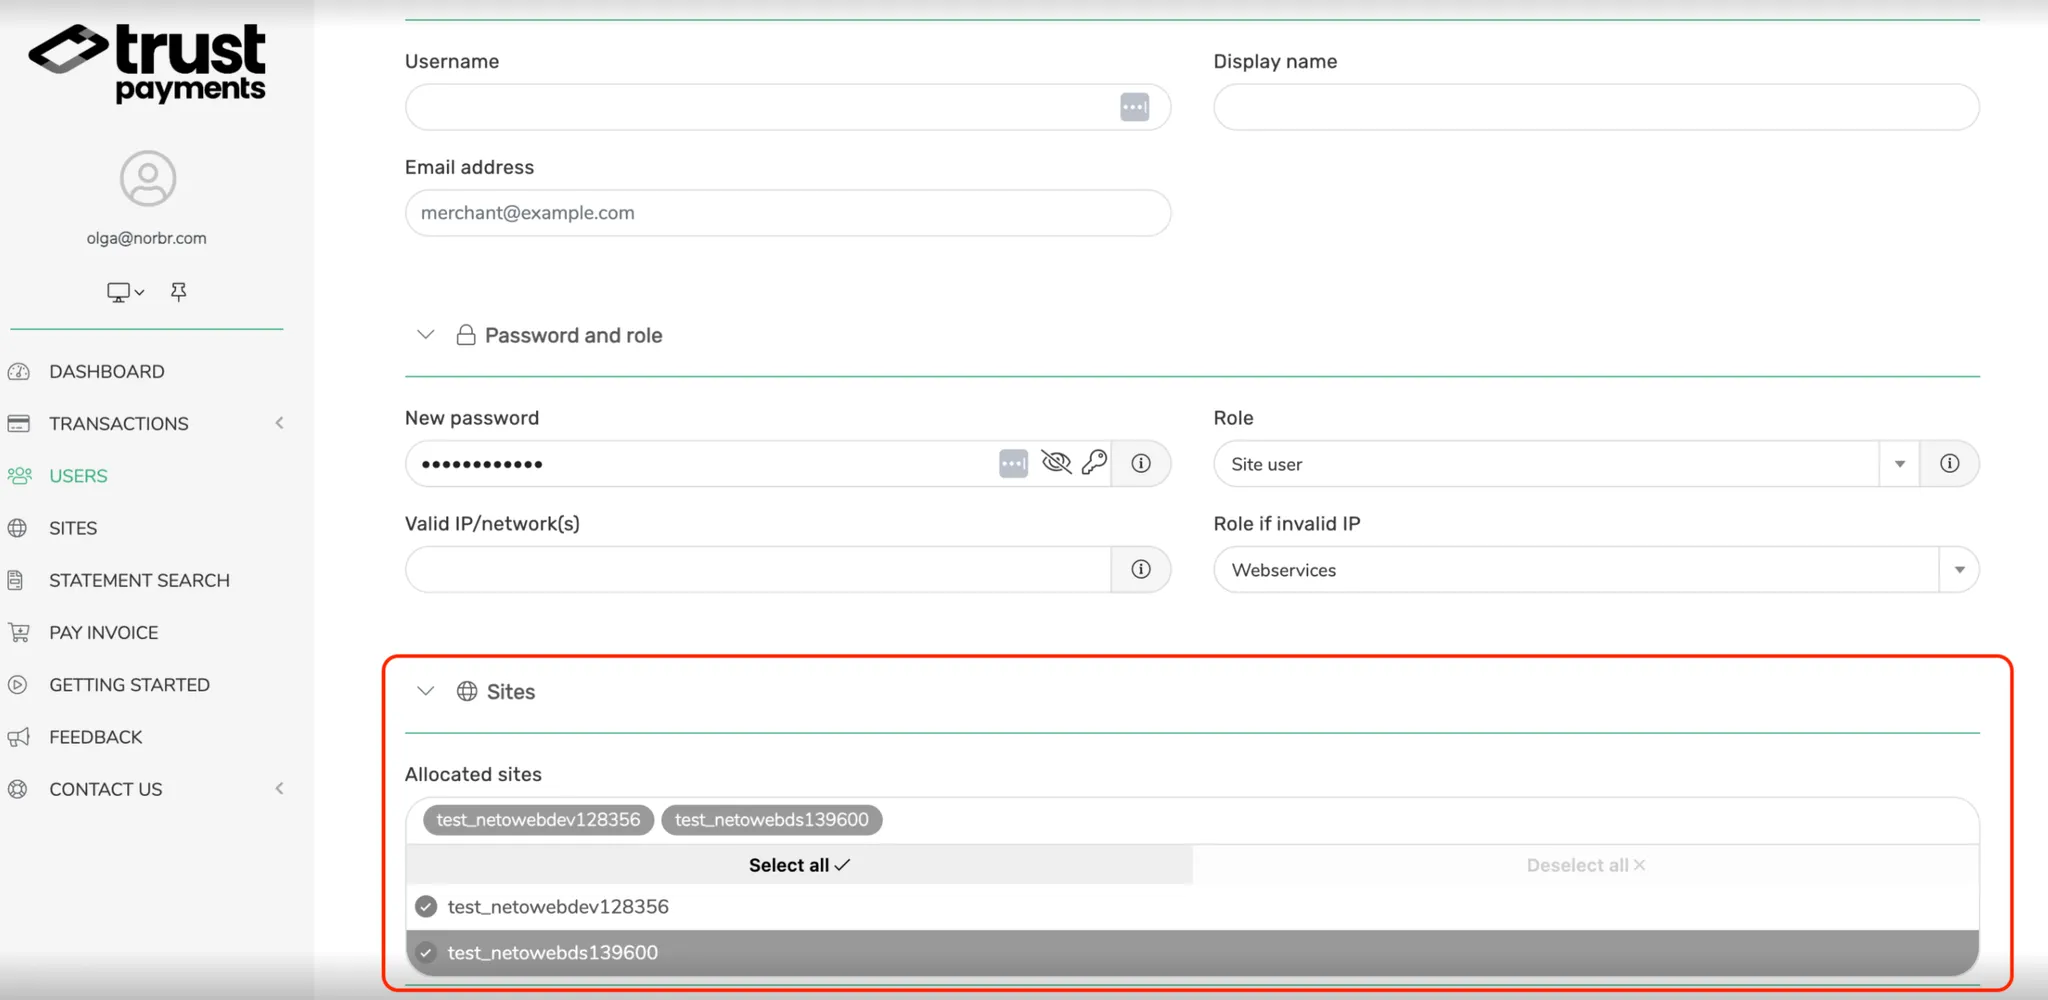
- Assign sites references to you user
After filling in al the above credentials, you need to assign the existing site references to your user.
Step 4 : Whitelist our production IPs :
Go to the Valid IP/networks and add the following IPs seprated by a “;” :
34.105.249.51
35.205.16.245
35.246.139.210
34.65.84.106
Sandbox IPs :
34.89.124.165
34.107.126.251
34.65.230.239
34.78.205.229
Step 5: Create a Merchant Contract to activate Trustpayments
Once you created the Webservice user(s), you will need to create a merchant contract to activate this Partner.
-
Log into our backoffice.
-
Navigate to Payment Network → Service Providers → Payment Providers → Add a new contract.
-
From the drop-down list select Trustpayments.
-
Fill in the required details.
-
Name your Merchant Contract for easy identification, eg. PSP name.
-
Merchant Contract ID will be populated automatically.
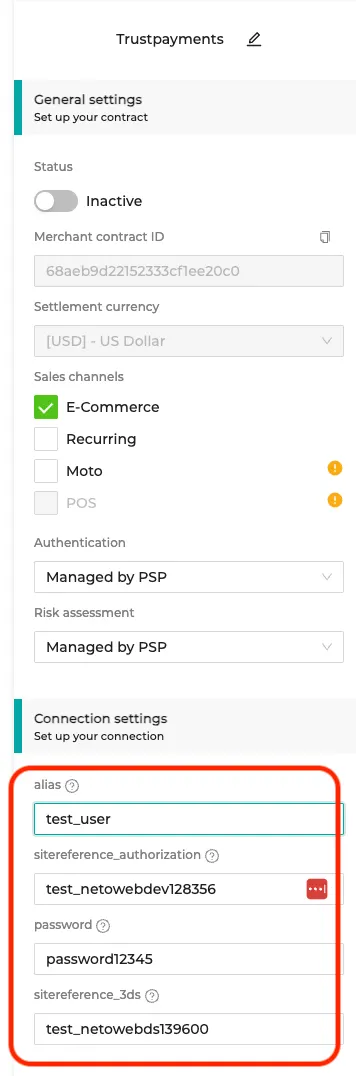
- Select your settlement currency from the drop-down list.
- Select your sales channels.
- Leave Authentication and Risk assessment unchanged.
- alias: username of a webservice user you created in your Trustpayments backoffice
- sitereference_authorization: site reference for authorization that you assigned to your webservice user
- sitereference_3ds: site reference for 3DS that you assigned to your webservice user
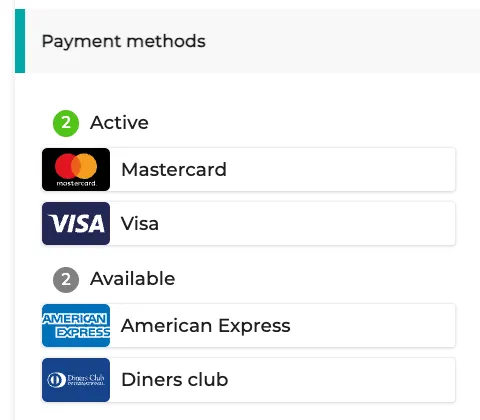
Step 6: Activate payment methods
Once you set up the connection by creating the Merchant Contract, you will be able to activate payment methods available for this Partner.
In the settings of your Merchant Contract where you earlier filled in the credentials and put other settings in place, you will see a section Payment Methods with two sub-sections: Active and Available. Simply drag and drop the payment methods from Available to Active.
Note: 3DS Testing details
When testing 3D-Secure flow, please make sure to use the following test cards:
- Challenge flow: 4900490000000667
- No 3DS: 4111111111111111
- Declined with authentication_indicator: ask_3ds: 4111111111111111
Updated 8 months ago