Merchant contracts
What is a Merchant Contract
A Merchant Contract represents a unique connection with a Payment Service Provider. Whenever you want to configure a connection with a new PSP, there will be a merchant contract created. Also, in some use cases, there could be more than one merchant contract for the same PSP.
Where to set a Merchant Contract
To set or edit your existing merchant contract:
-
Log into your merchant account.
-
Navigate to Payment Network in the Integration section on the left hand side.
-
Go to Service Providers and next to Payment Providers.
-
If you have more than 1 merchant account, select one from the drop-down at the top.
*There is a Mock PSP added to your Sandbox account by default - if not, reach out to Support to have it added.
-
To add a new Partner open "Add a partner" drop-down and select the one from available for you.
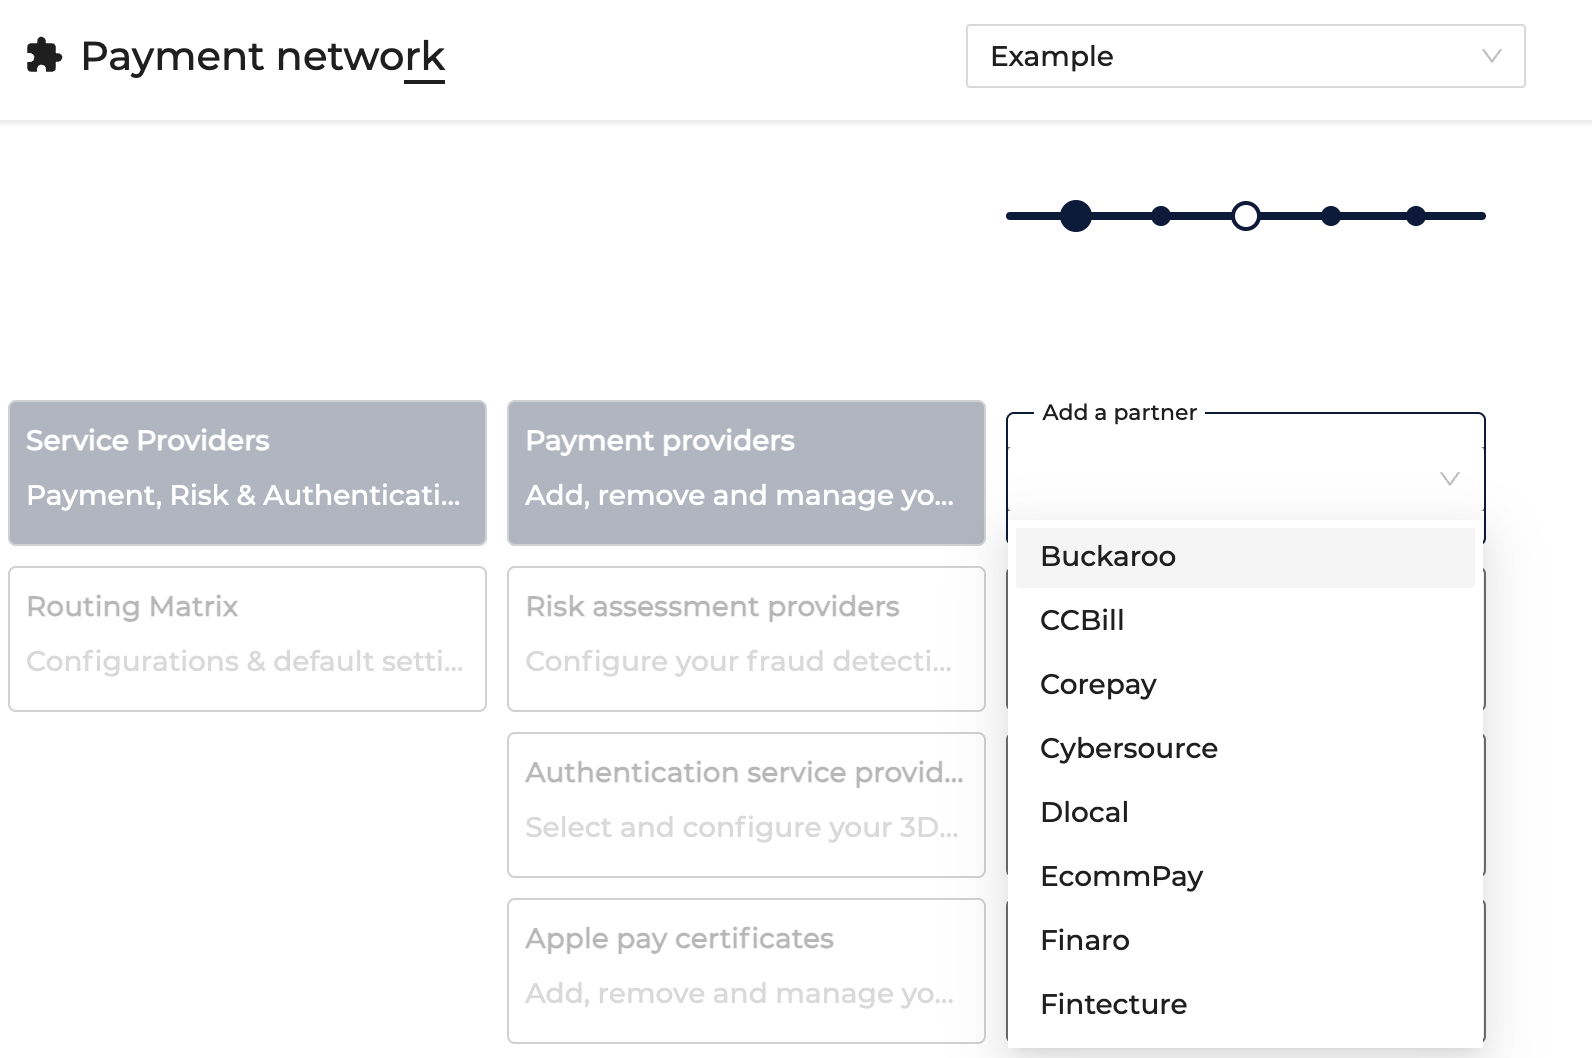
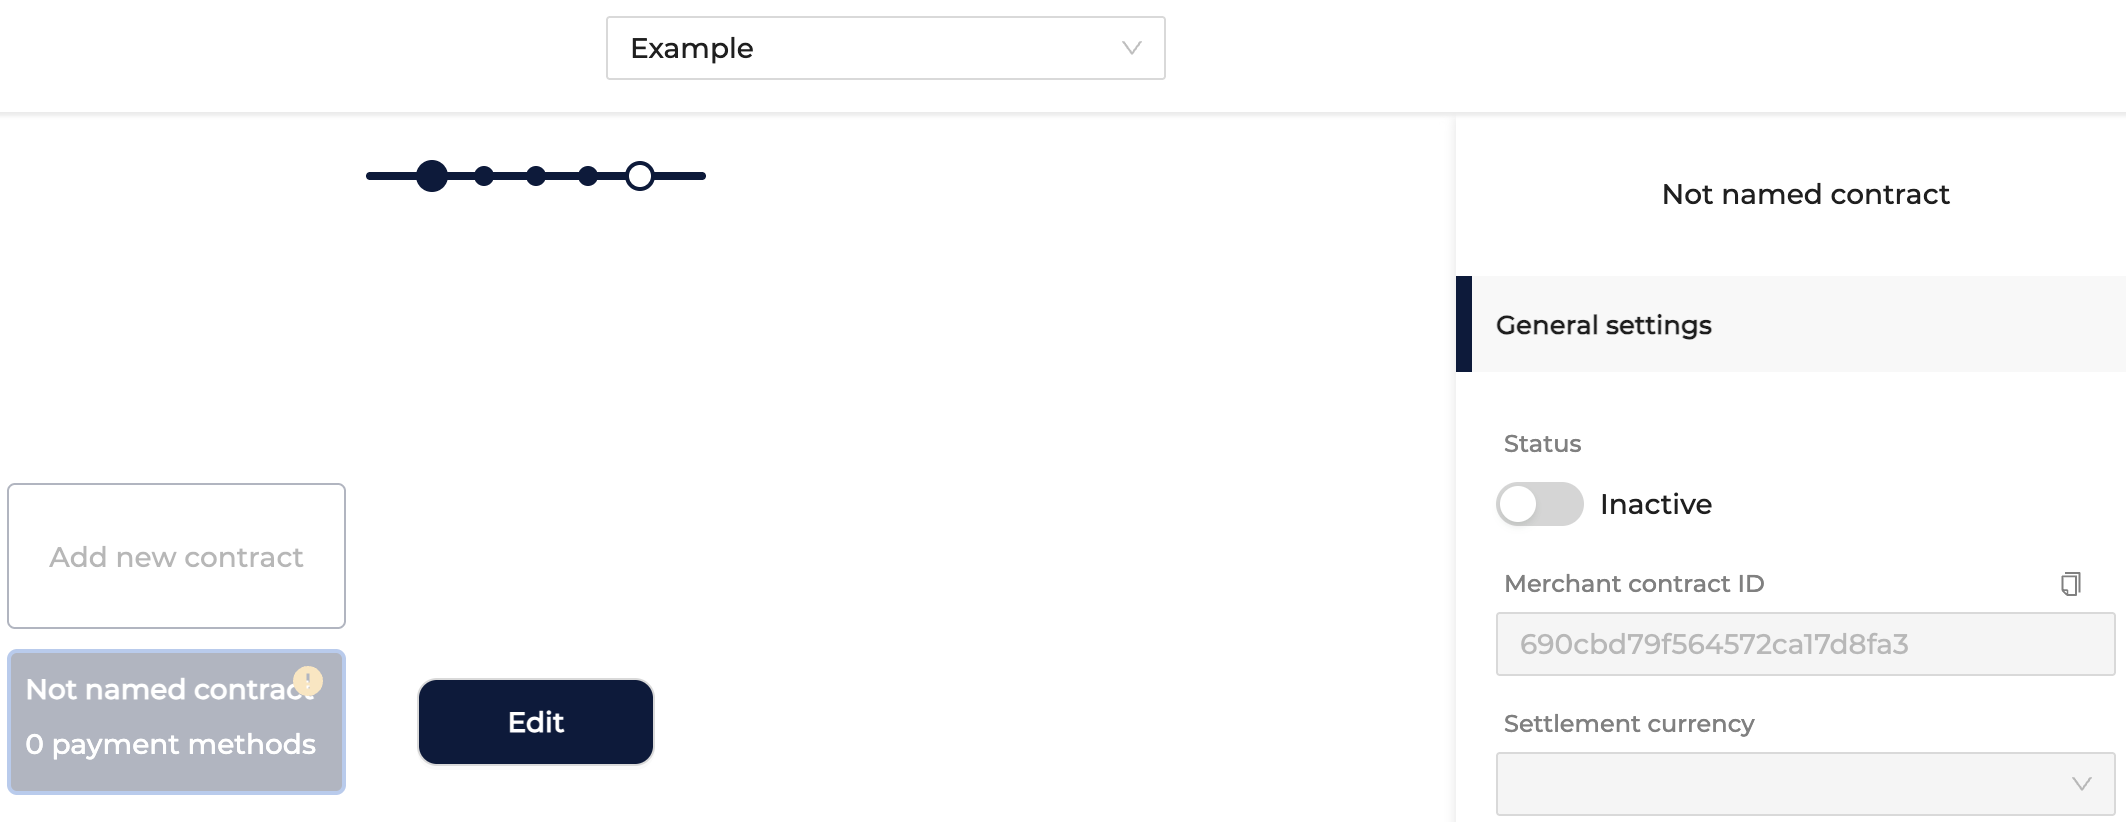
- You will see a new "Not named contract" being created where certain settings need to be configured.
Configure your merchant contract
General Settings
- Status: Active or Inactive
After adding a contract for the first time, please make sure to Activate it. If, for any reasons, you want to temporarily stop using this contract you can deactivating it. Once you want to start using it again, simply activate it.

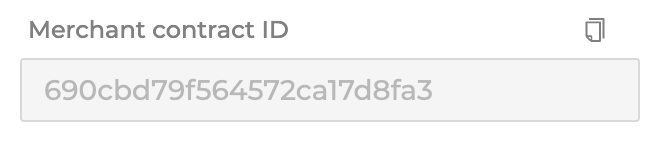
- Merchant Contract ID
The unique identification of you Merchant Contract. Useful especially when testing the integration with a specific Payment Provider or with the Mock PSP. It is generated automatically when creating the contract.
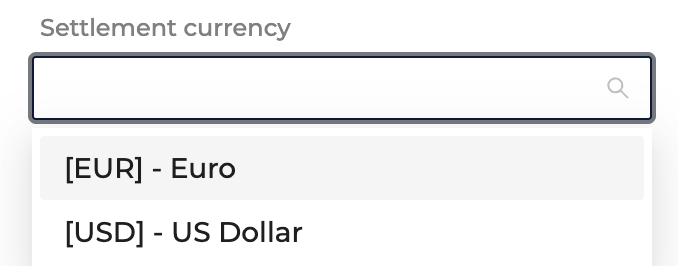
- Settlement Currency
The currency in which your payments processed with this Payment Provider will be settled. In case you accept other currencies for different payment methods, payments made in currency different than the settlement currency, will be exchanged for the settlement one.
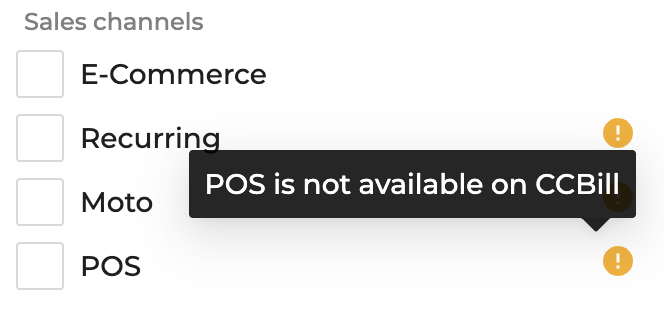
- Sales Channels
Sales channels active within this Merchant Contract: E-commerce, Recurring, MOTO, POS.
Please note that not all channels may be available for each Payment Provider.
- Authentication
Setup for where the authentication is Managed (by default Managed by PSP)

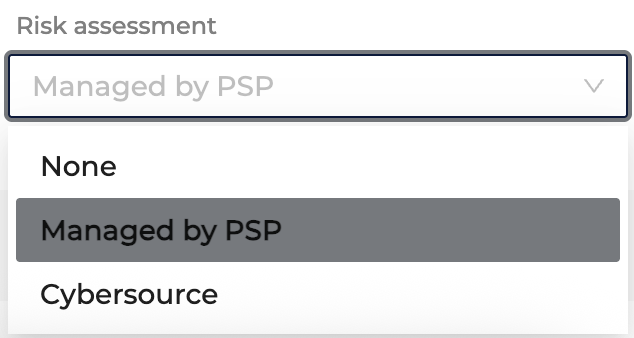
- Risk Assessment
Setup for where the risk assessment is Managed (by default Managed by PSP)
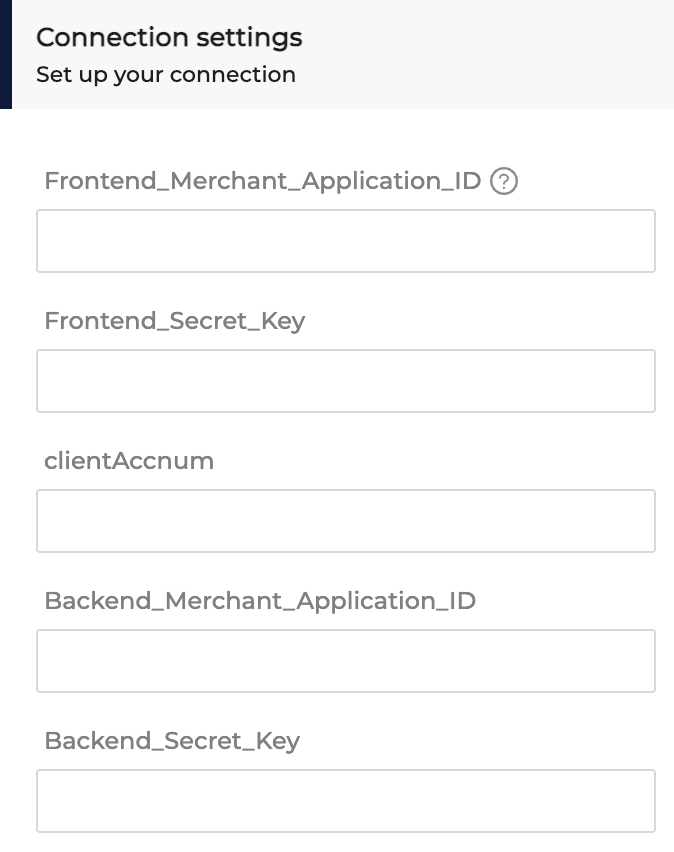
Connection Settings
In the connection settings, you will find different type of information fill in, depending on a Payment Provider.
Some of these fields could be:
-
a SecretKey and PublicKey obtained from your Payment Provider
-
Google Pay merchant ID for accepting Google Pay payments
-
some other fields for identifying your account on the Payment Provider side (eg. account name and password)
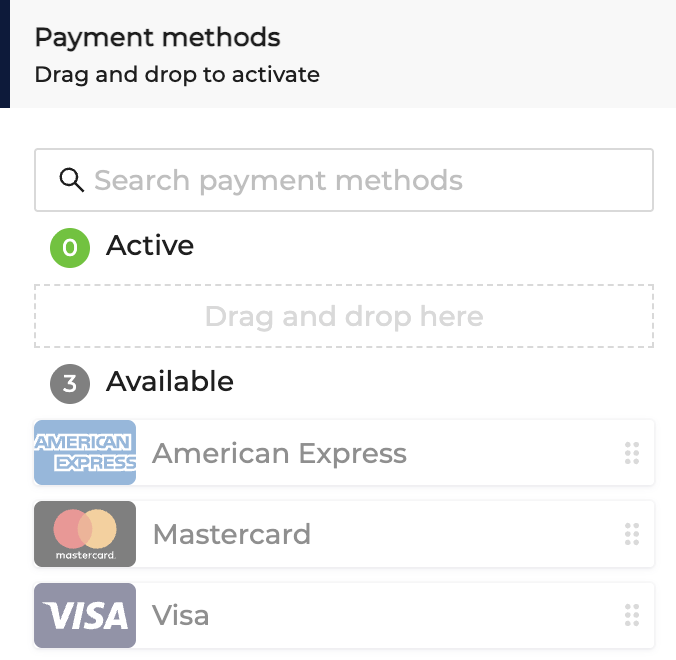
Payment Methods
In this section of your Merchant Contract you will find:
- Active Payment Methods for the contract you are reviewing
- Available Payment Methods for the contract you are reviewing
Available Payment Methods are payment methods you can simply activate and are supported for the used Payment Provider. If you see a payment method logo that is grayed-out, this means the payment method is available after completing some additional requirements, eg. uploading a certificate for ApplePay.
Please visit Manage payment methods section to learn how to edit payment methods (eg. accepted currencies).
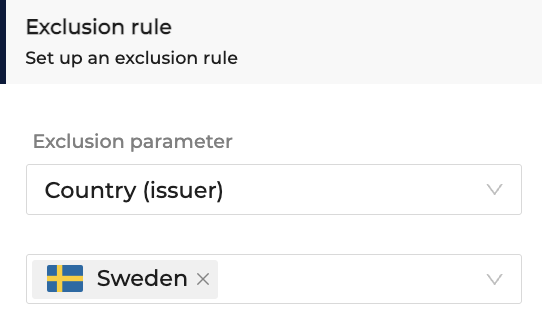
Exclusion Rule
The Exclusion Rule section within the Merchant Contract allows you to setup a rule for which this Merchant Contract will not apply.

Example:
Merchant Contract: Stripe, EUR Settlement currency, Visa and Mastercard Active Payment methods
Rule: Card Issuer Country = Sweden
Result: For all payments initiated with a card issued in Sweden, the payment will not be processed through this contract.
Updated 8 months ago