Hosted Payment Page Integration
Pre-requirements:
Before following the steps to create your first payment, make sure that:
- Your have an access to your (Sandbox) Merchant Account
- You have generated your API keys
- You have at least one configured merchant contract with at least one payment method active
- You have configured the handling of redirect URLs at least for:
accept_url,decline_urlandcancel_url - You have configured your webhooks to receive notification about the order status
Step 1: Create Checkout Request
Set at least the following in the request body: amount, currency, operation_type, order_merchant_id, payment_channel: ecommerce, type: hosted_page
Send a POST request to /payment/checkout and receive a redirect_url in the response.
{
  "amount": 1,
  "currency": "EUR",
  "operation_type": "authorize",
  "order_merchant_id": "123456",
  "payment_channel": "e-commerce",
  "type": "hosted_page",
  "accept_url": "https://www.accept.com",
	"cancel_url": "https://www.cancel.com"
}
{
"result": {
"code": "011111",
"description": "checkout created successfully"
},
"redirect_url": "https://securepay-sandbox.norbr.com/390ede13b7f3096b39d191eb4f910f854d2abbcd2427bb756699987e1b3a5b5f",
"checkout": {
"accept_url": "https://www.accept.com",
"amount": 1,
"cancel_url": "https://www.cancel.com",
"currency": "EUR",
"customer_browser_info_time_zone": "",
"decline_url": "https://www.test.com",
"exception_url": "https://www.test.com",
"expiration_date": "2025-08-25T15:48:09.403Z",
"hosted_page_configuration": {
"status": "active",
"logo": null,
"primary_color": "#f4d03f",
"show_pci_logo": true,
"host": "gtw",
"url": "",
"hosted_fields": {
"version": "2.3",
"display_buttons": false,
"display_cardholder": true,
"display_save": true,
"use_auto_submit": false,
"logo_version": "logo_colorbg",
"template_version": "v3"
}
},
"operation_type": "authorize",
"order_merchant_id": "123456",
"token_type": "oneshot",
"type": "hosted_page",
"payment_channel": "e-commerce",
"payment_method_name": [],
"pending_url": "https://www.test.com",
"status": "created",
"merchant_data": [],
"checkout_id": "68ac8235513816130c77a312"
}
} Step 2: Make a test payment in the created checkout
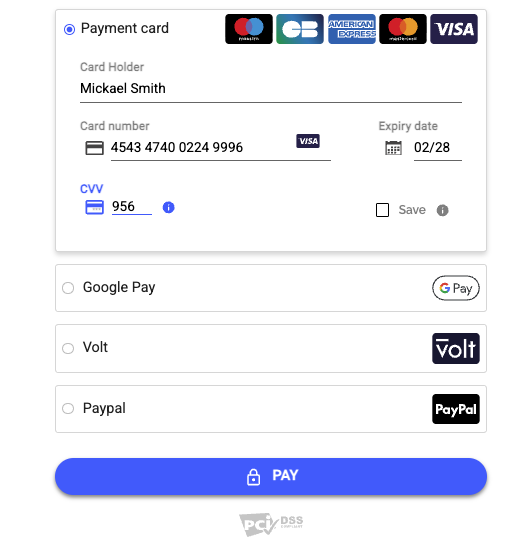
In the response to your checkout creation request, you will receive a redirect_url. Copy the link received and you will be redirected to your hosted payment page. Your hosted payment page reflects all payment methods that are activated in your account, unless you specify a payment method in your checkout creation request, using payment_method_name parameter.
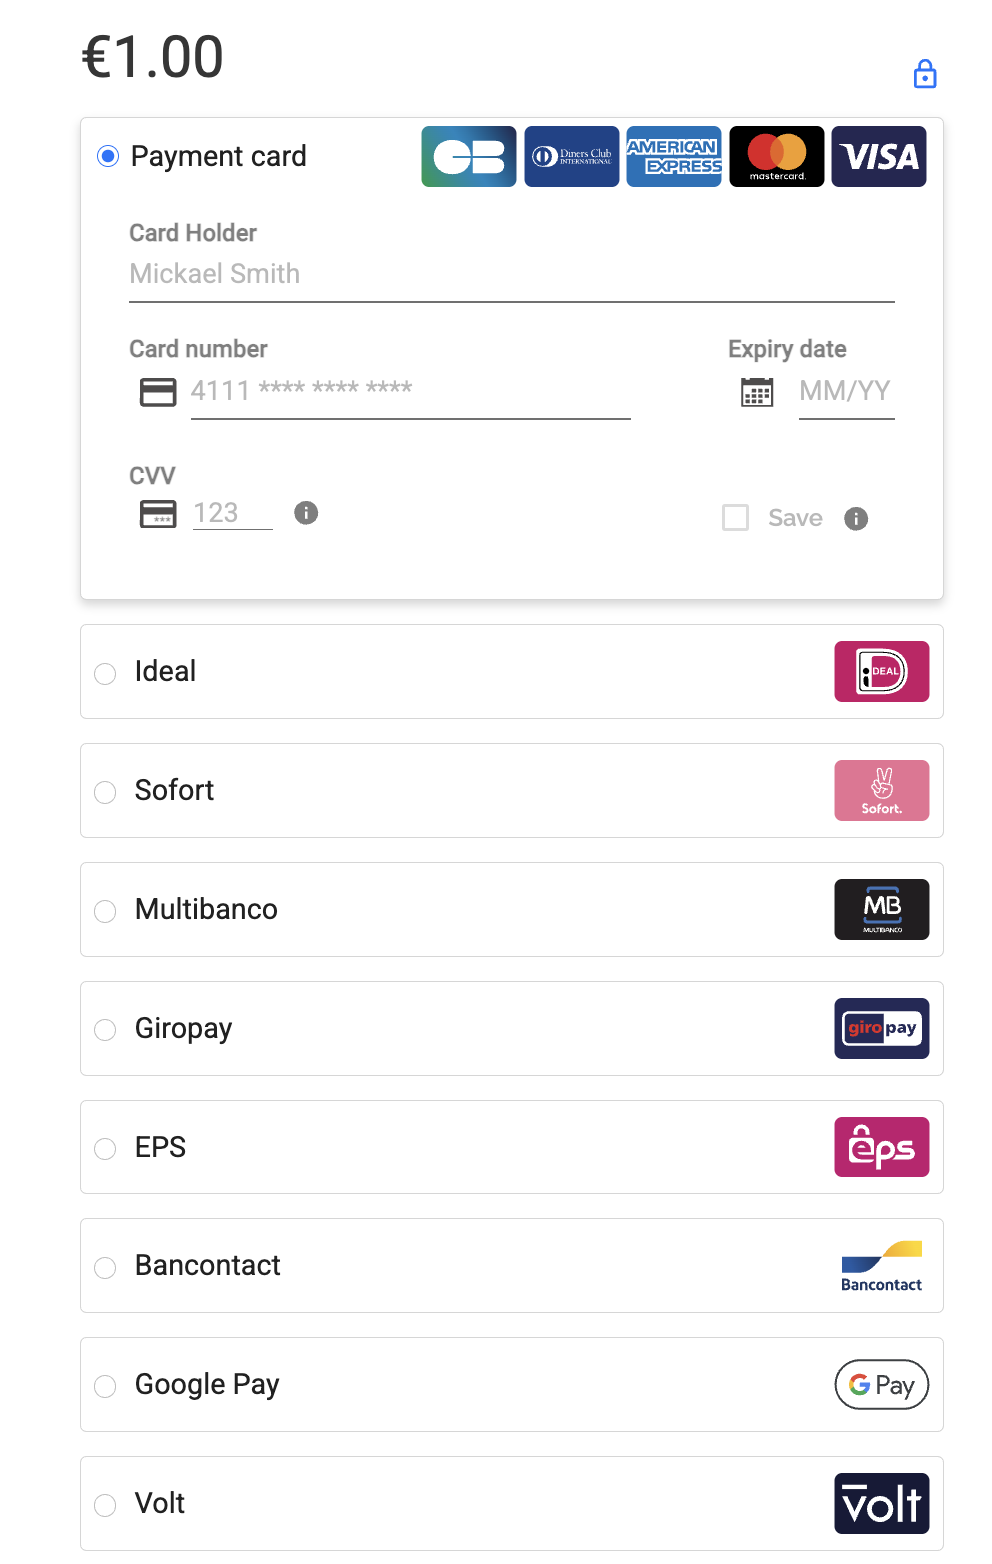
Hosted payment page with all activated payment methods

Hosted payment page with payment method specified: Visa
Step 3: Fill in the card details
To finalize the test, you will need to fill in all required test card details. Once it's done, proceed by clicking on PAY button.
Depending on the result, you will be redirected to the respective link (accept_url, cancel_url, decline_url, pending_url).
Step 4: Check your payment status in your Merchant Account
Once you have proceeded with the payment, you can check its status in your Merchant Account.
Do do so, please navigate as follows:
- Log into your Merchant Account
- On the left hand-side bar in section Brainpower select Orders
- You will see all your orders for the selected period of time (set to Current month by default) with the most recent one a the top.

Updated 8 months ago