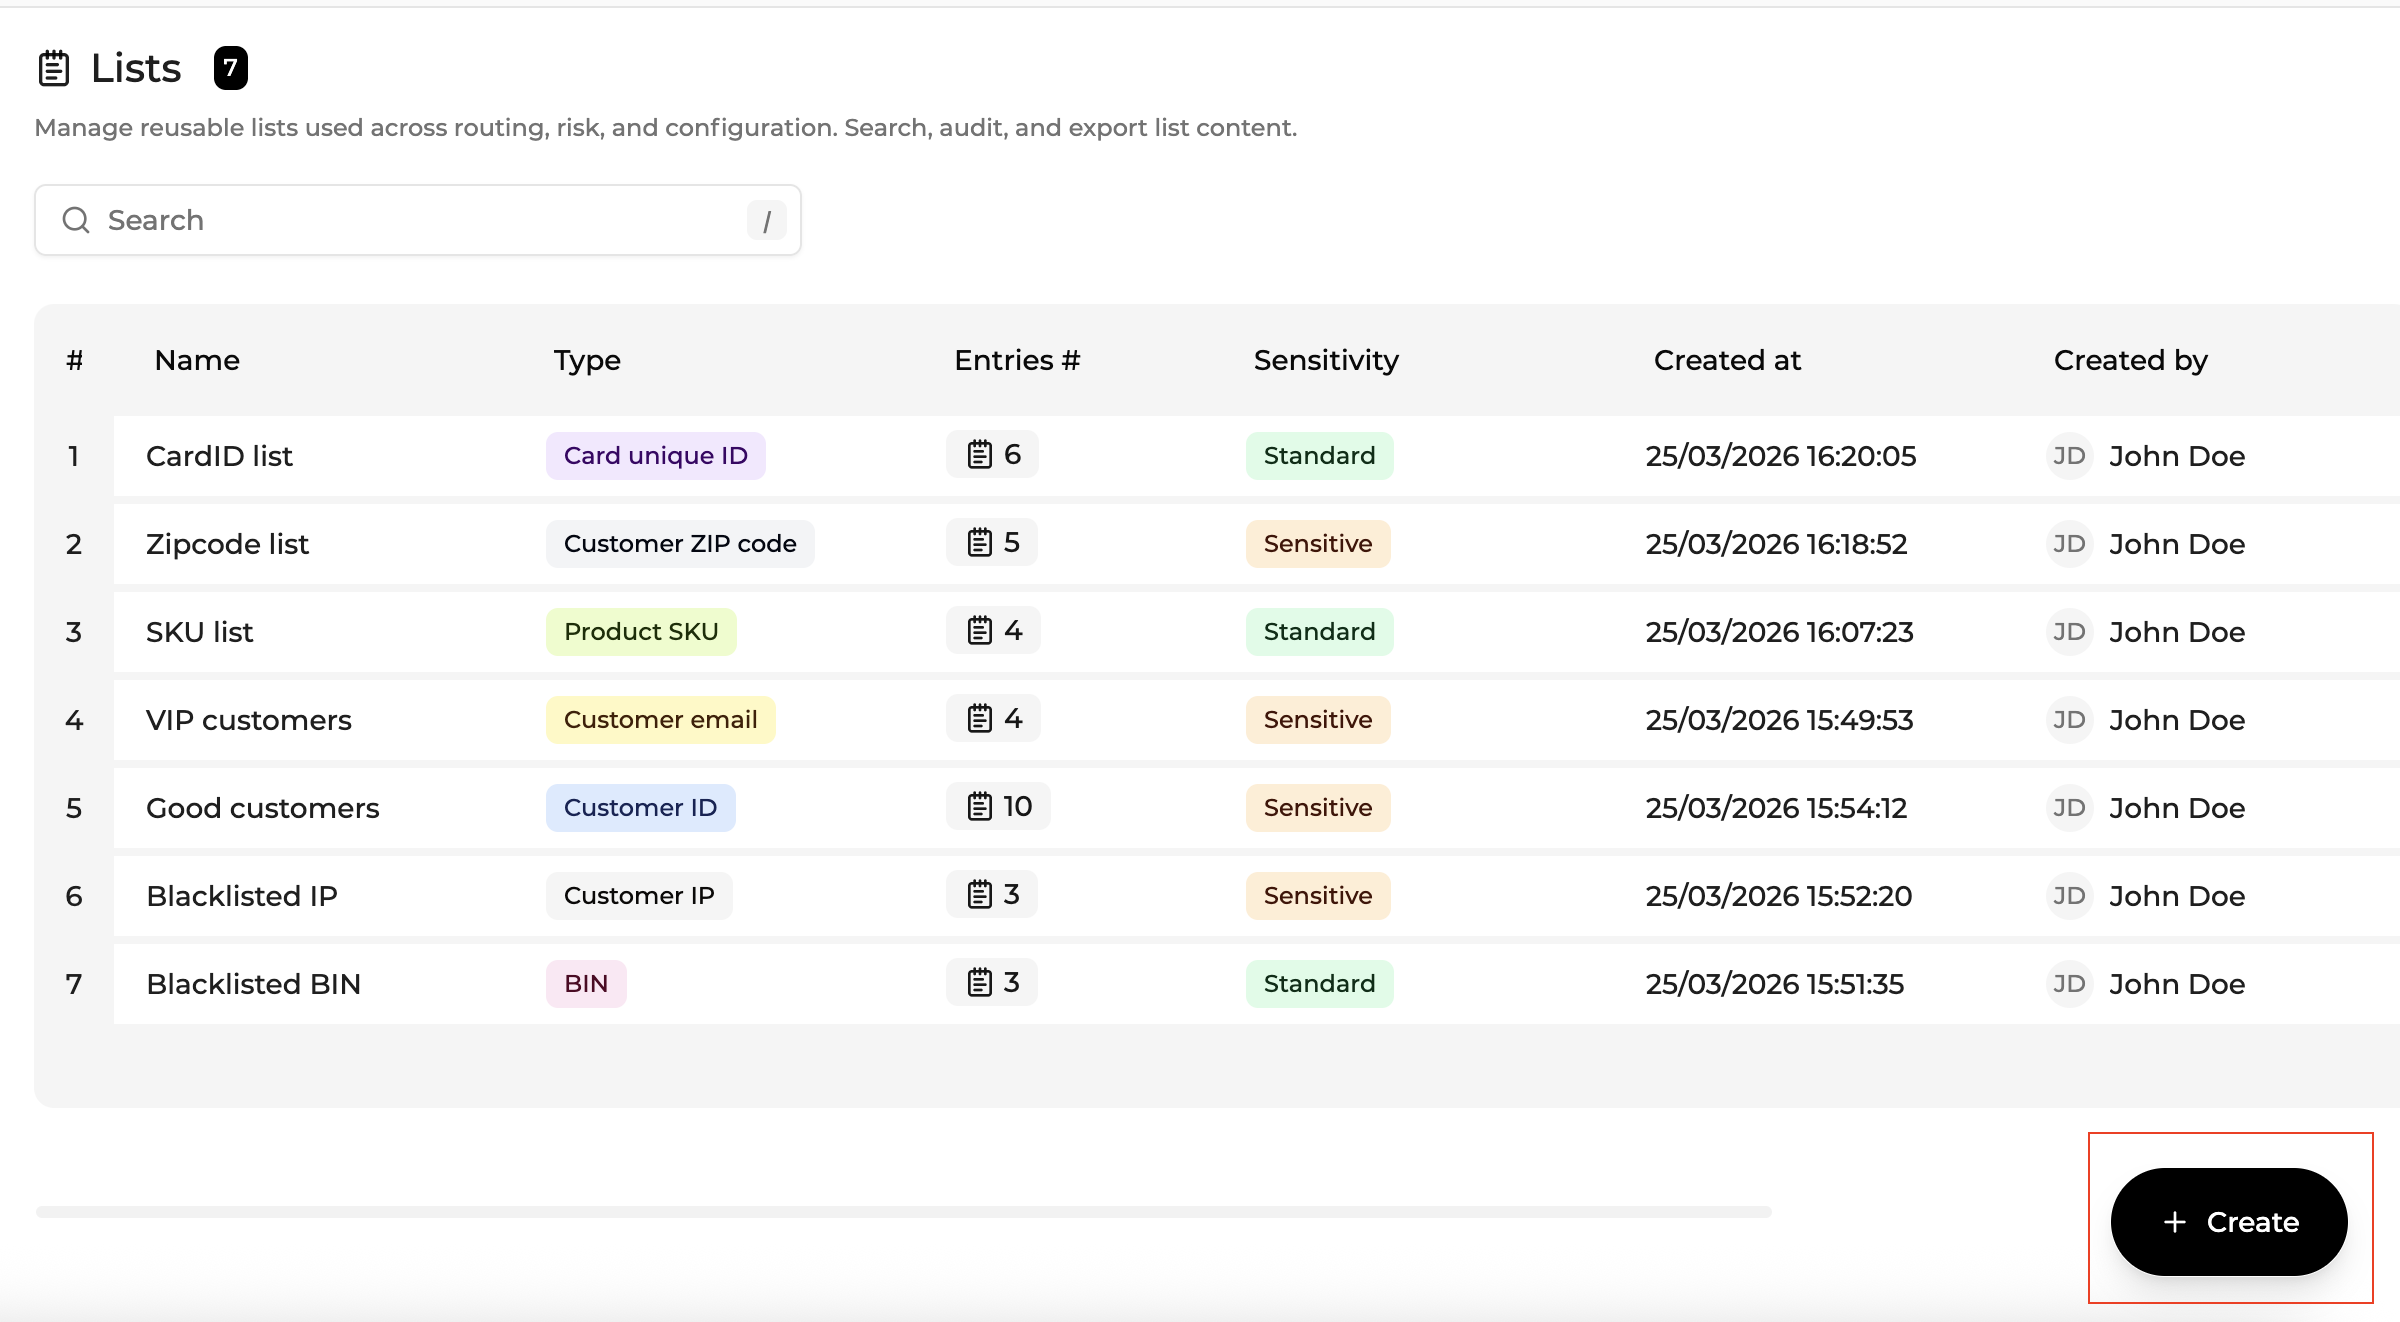
Managing Lists
Creating a List
To create a list
- Navigate to Integration → Lists
- Click Create (bottom right of the page)
- Enter the list name, choose the list type, and then click on Create (top right of the page)
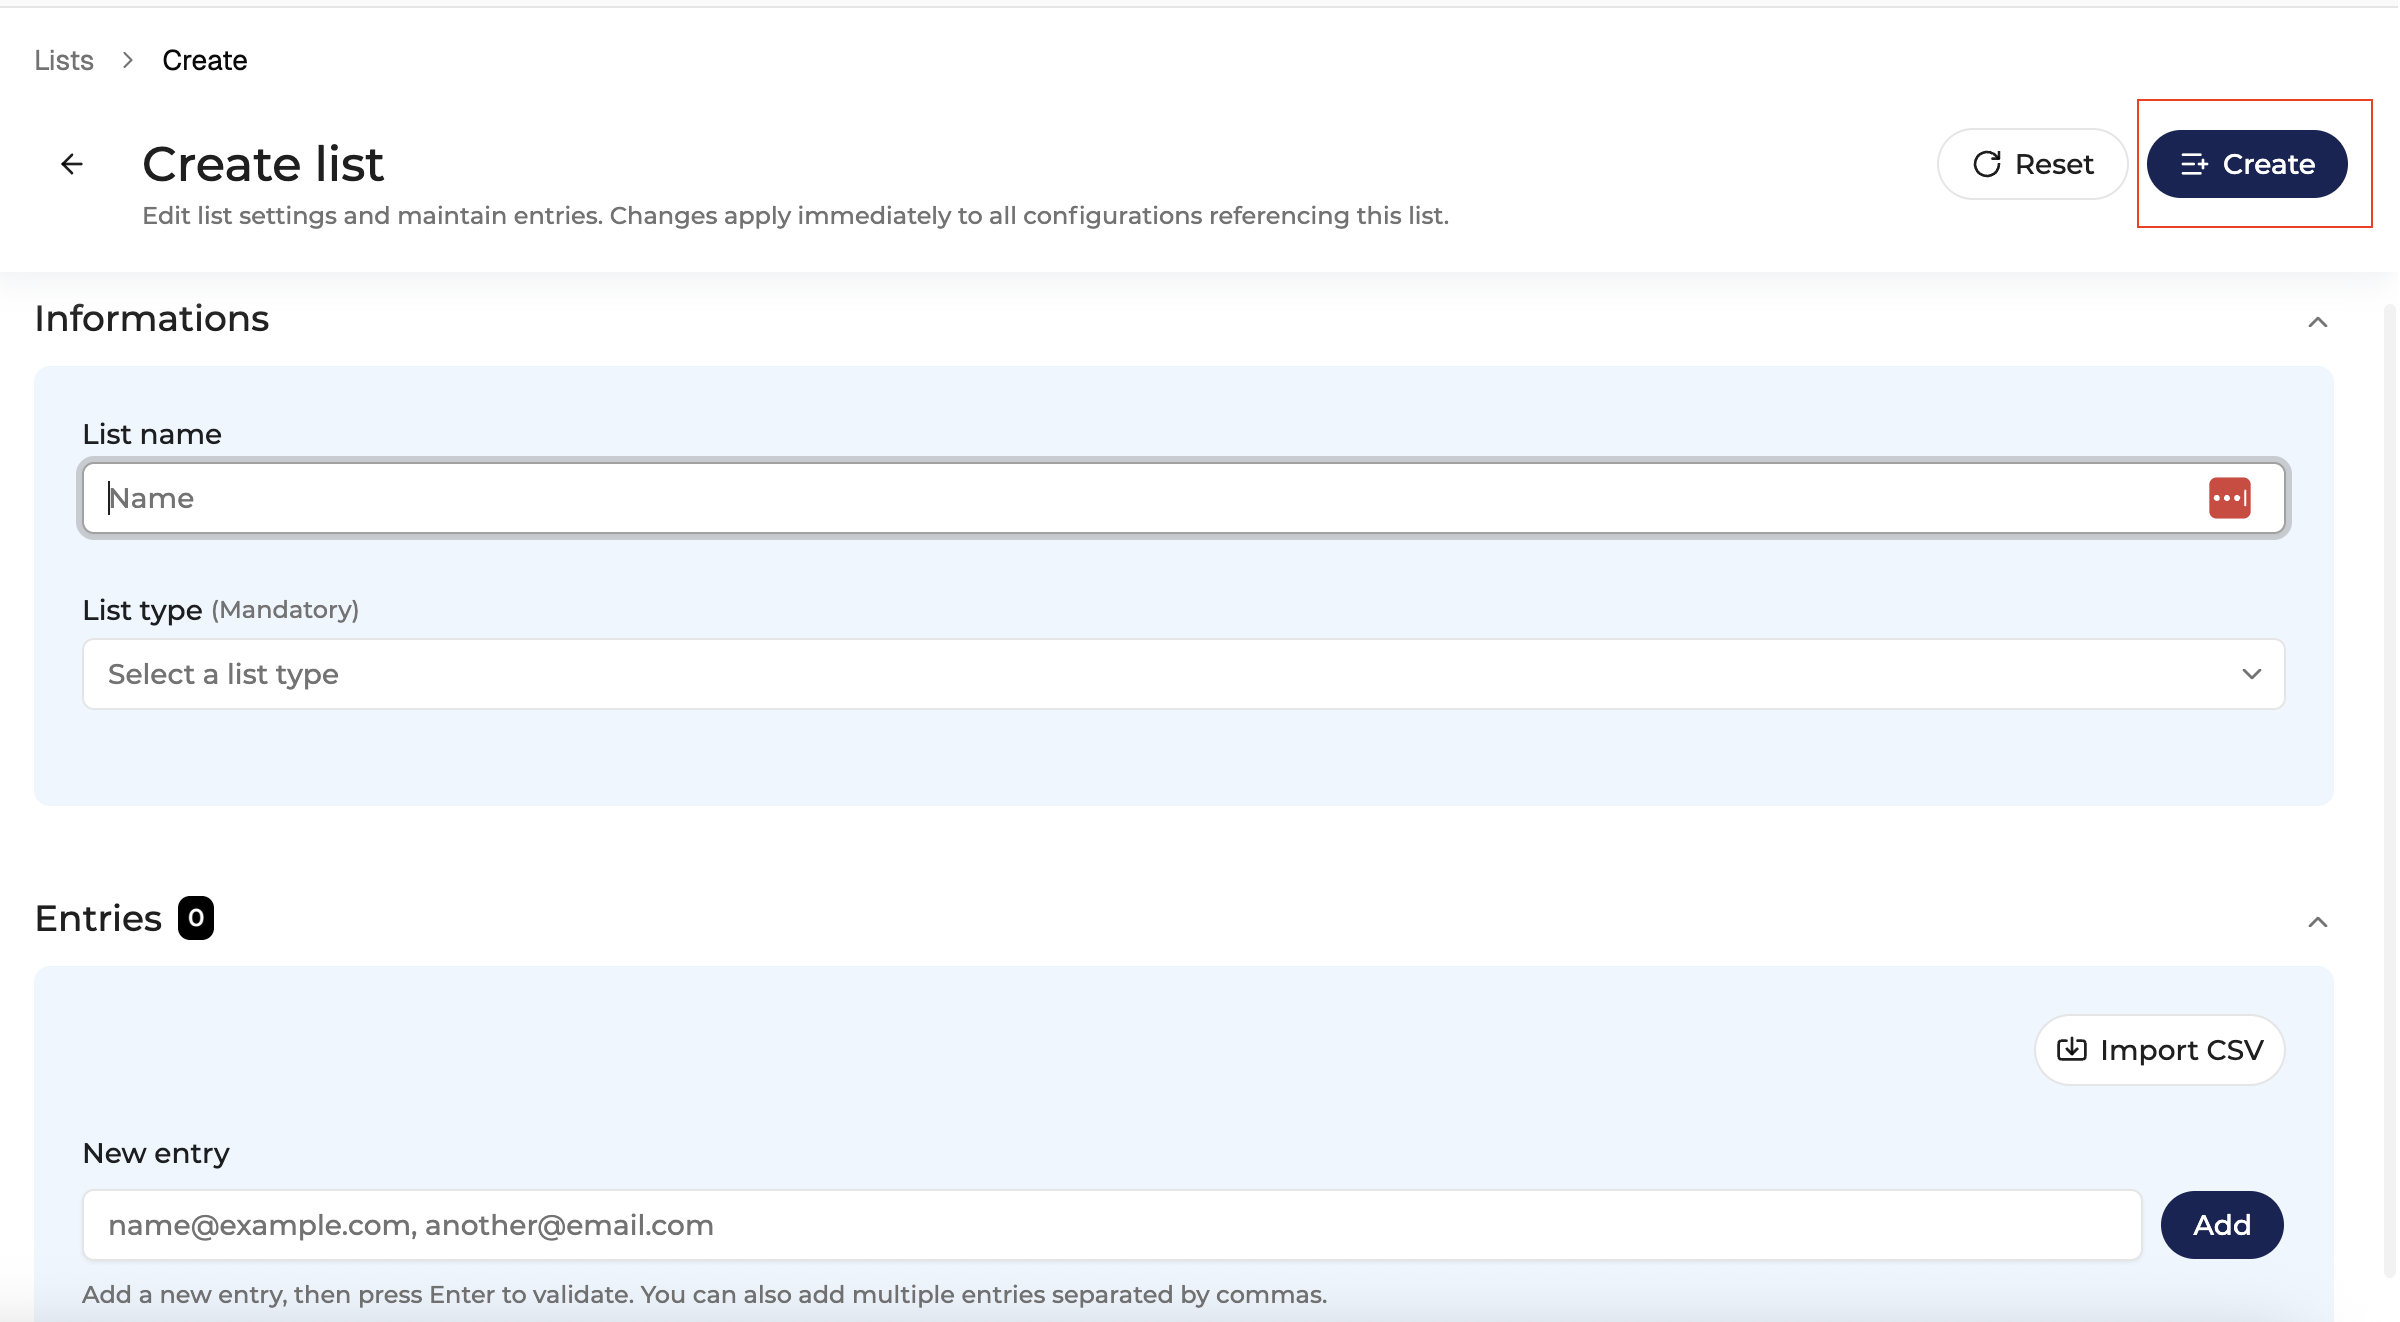
Lists are created within a defined scope. Depending on the context, a list can belong to a Company or to a specific Merchant Account. This ensures that entries are not mixed across organizations or environments.
The creation dialog requires:
| Field | Description |
|---|---|
| Name | Unique list name |
| Type | The entry type enforces validation rules and ensures that entries can only be used in compatible workflows. |
Important rules
- The list type cannot be modified after creation
- List names must be unique within the same company for a given type
After creation, the user is redirected to the List Detail page.
Entry validation
Each list is associated with a specific entry type.
The entry type indicates how values may be used across the platform (for example in rules, filters, or cross-navigation).
In the current version, the Console does not enforce strict client-side validation of entry formats.
Example values are shown in placeholders to guide users, but entries are accepted as provided.
This flexibility allows lists to support heterogeneous identifiers depending on gateways, PSPs, or merchant data models.
Best practises
Use descriptive naming
Examples:
Fraud - Blocked BINs
Risk - Suspicious Emails
Operations - VIP Customers
Maintain lists regularly
Fraud patterns evolve quickly. Lists should be periodically reviewed.
Be careful with BIN entries
A single BIN can represent thousands of cards and affect many transactions. Always verify before saving.
Editing a List
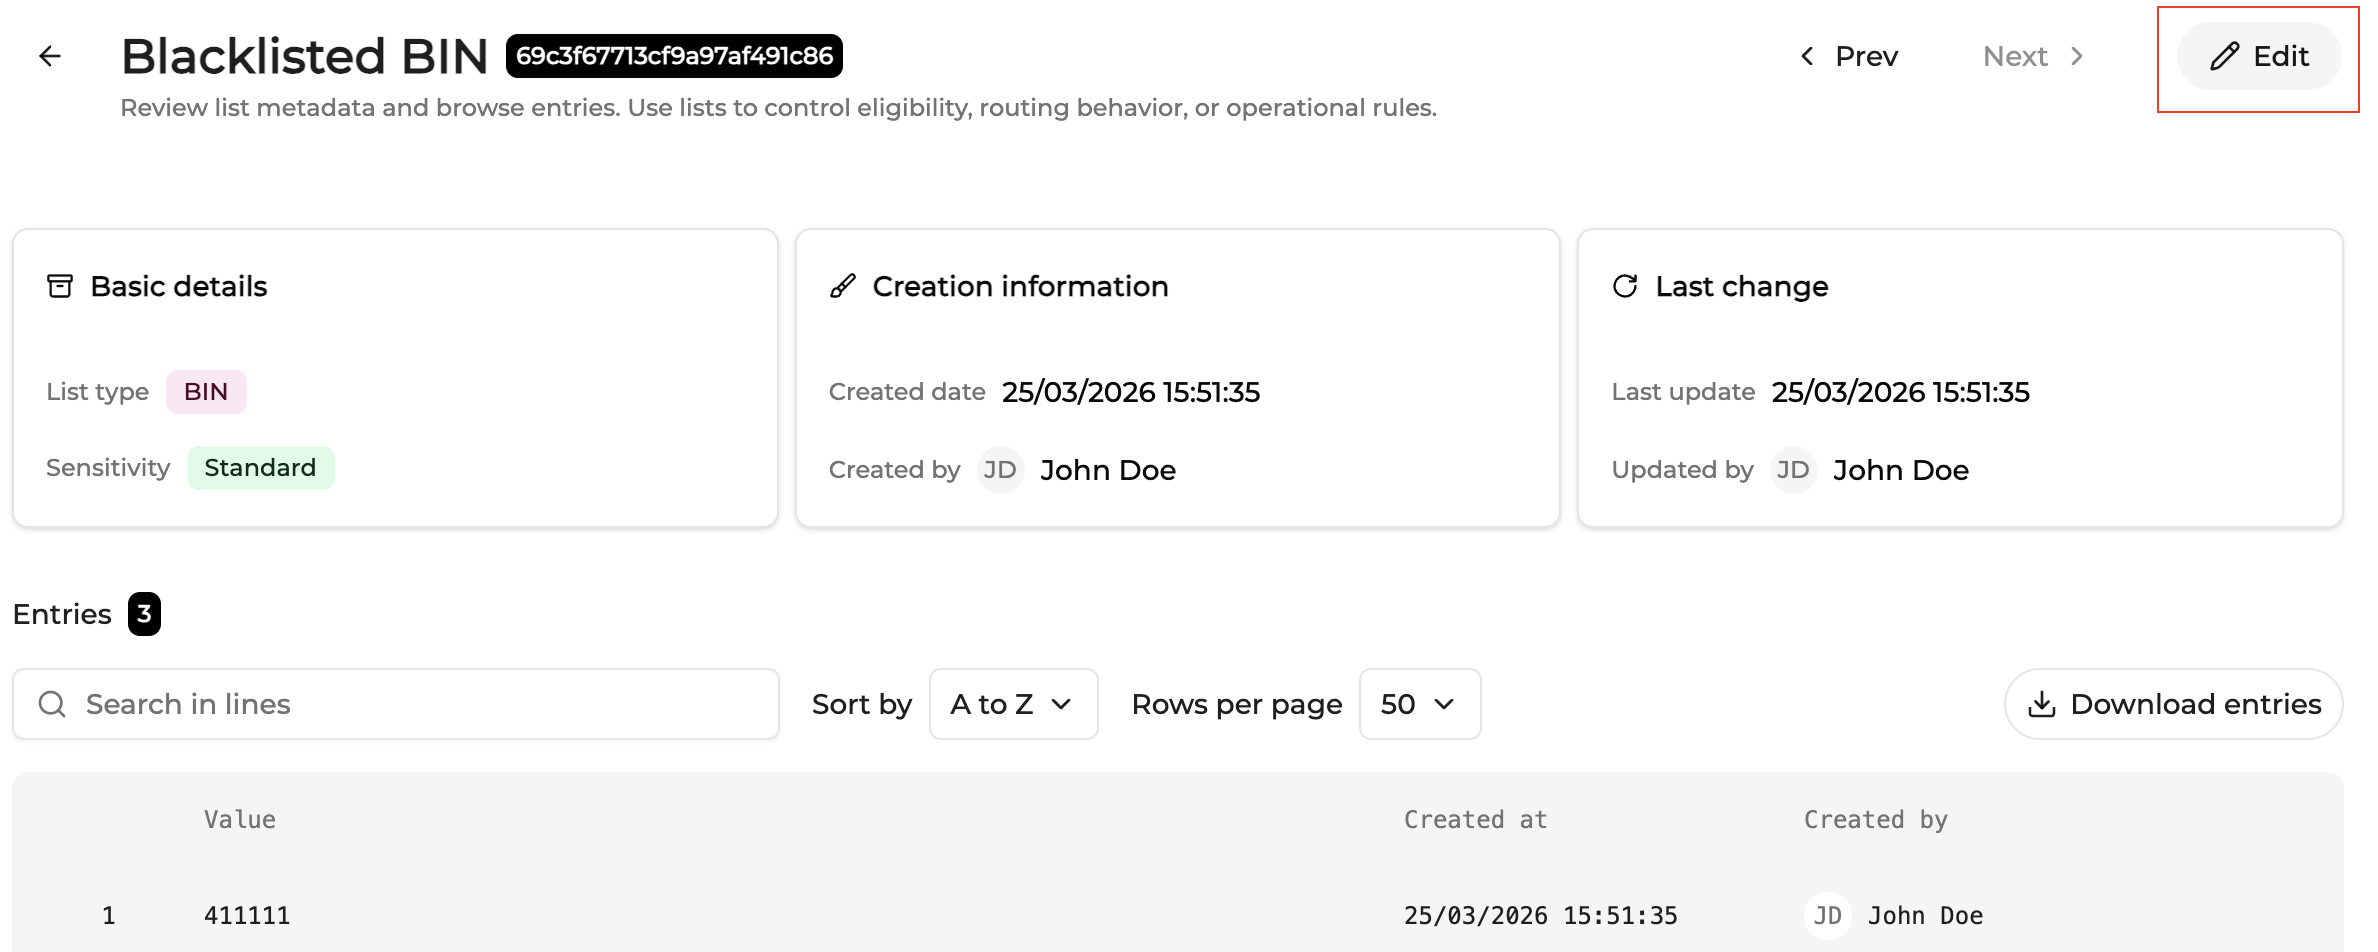
Click Edit to enter edit mode.
In edit mode :
- Entries can be added
- Entries can be deleted
- CSV files can be imported
- Pending changes can be reset
- The List can be deleted
Changes follow the Console draft model and are only applied after clicking Save.
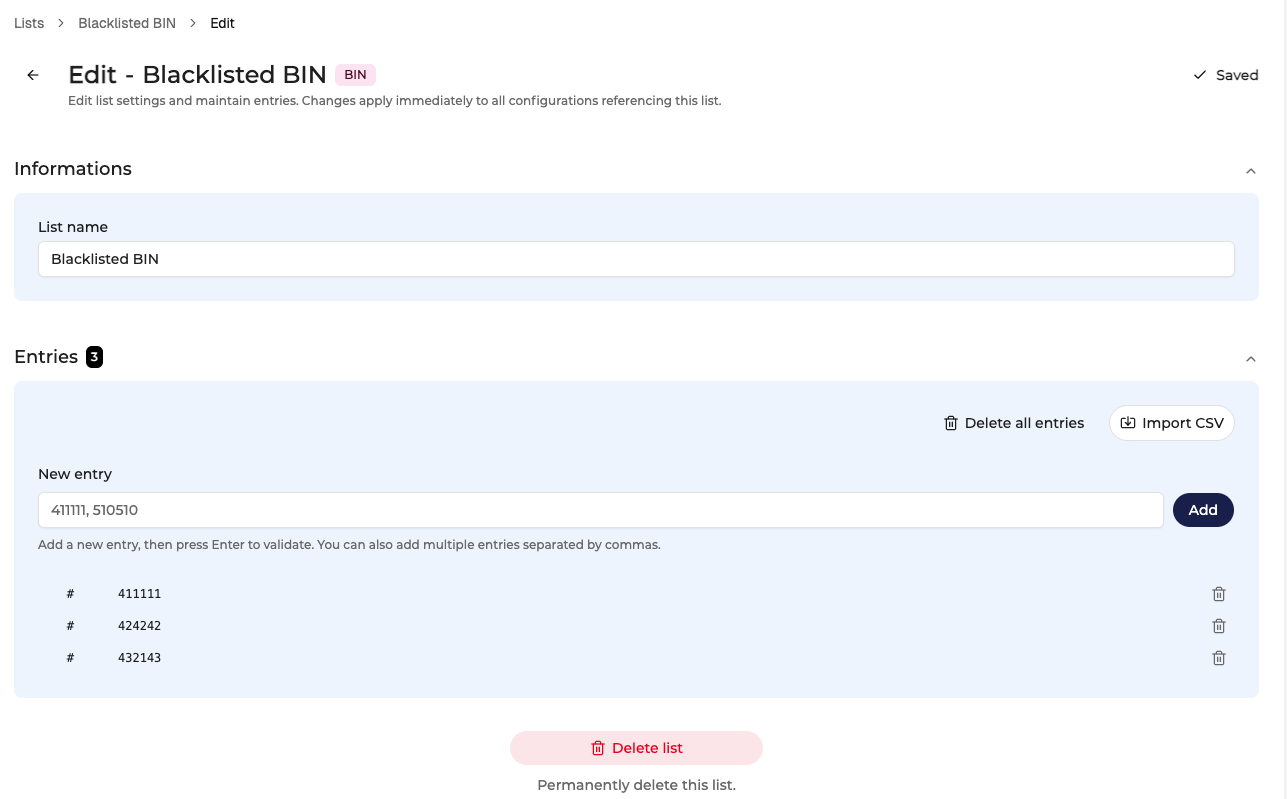
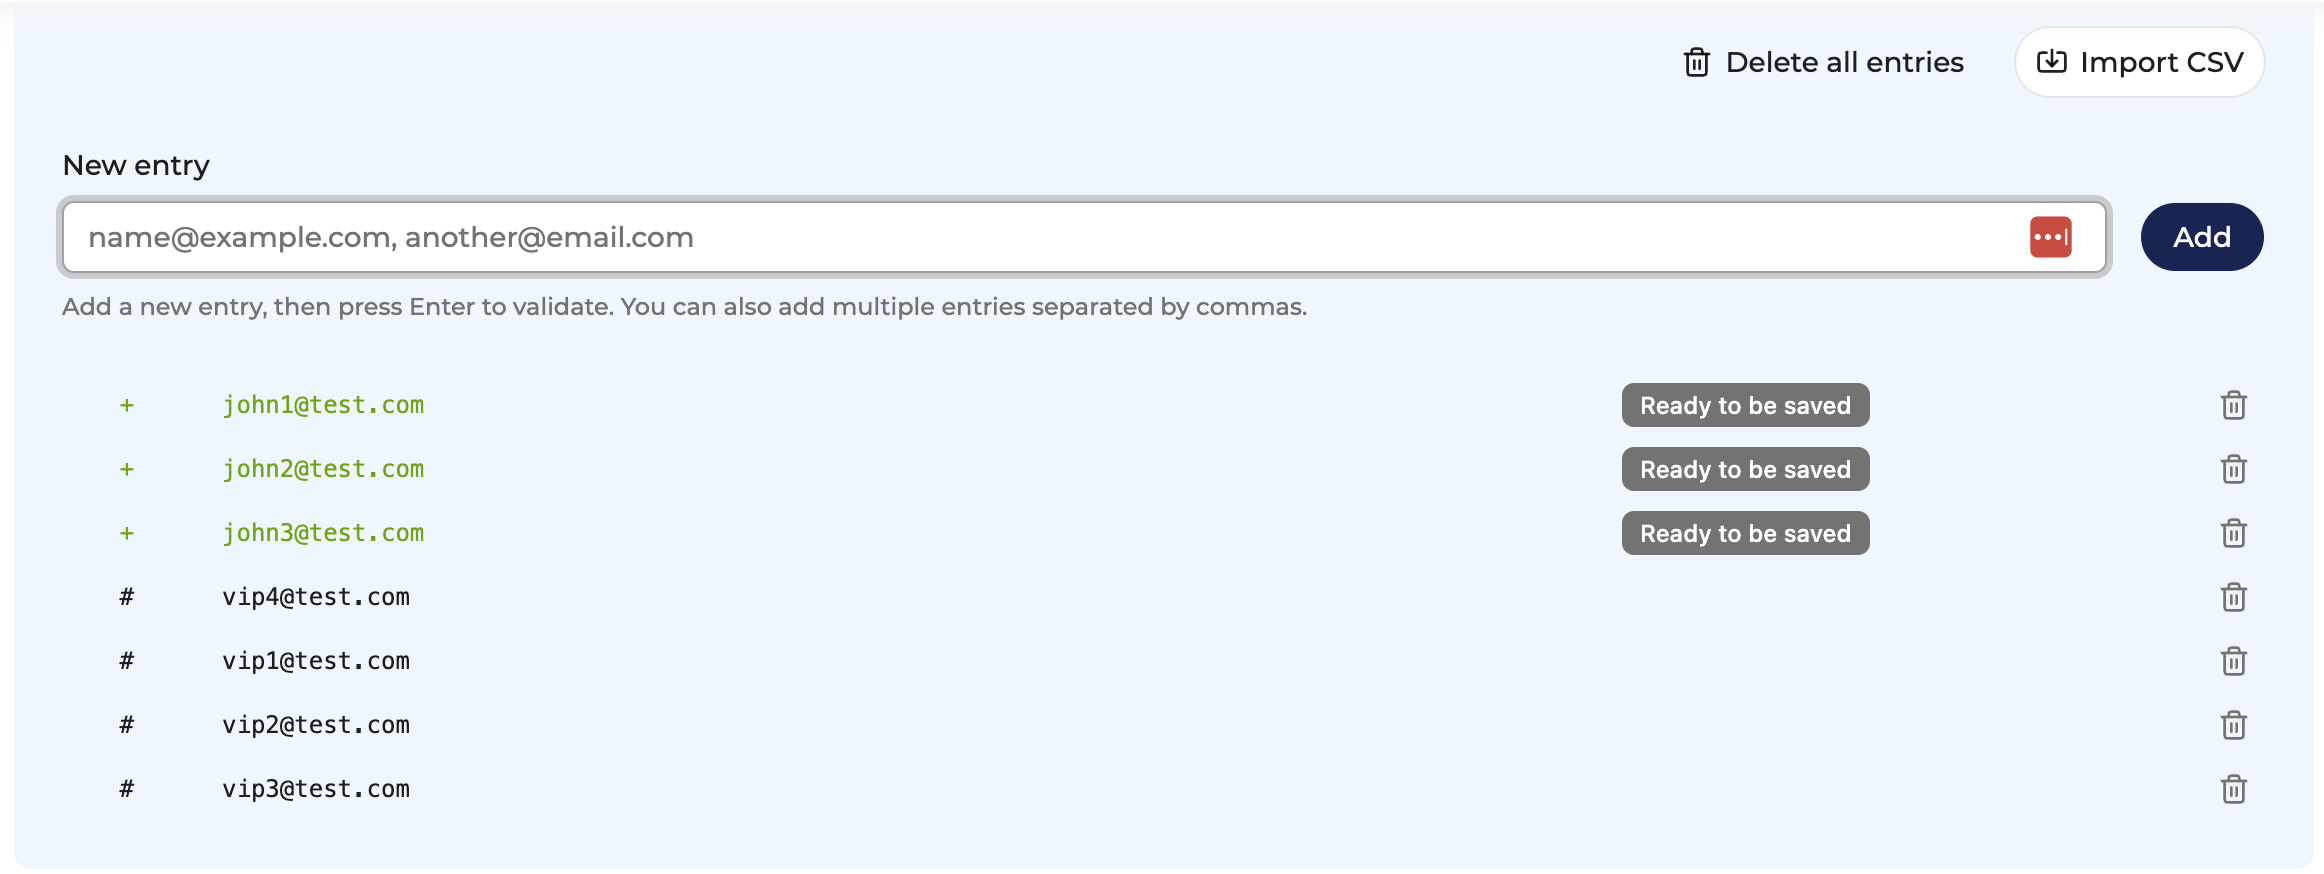
Adding entries
Entries are added through the New entry field.
The placeholder adapts to the list type and shows example values to guide users. Example values may include BINs, emails, customer IDs, IP addresses, ZIP codes, or product SKUs.

Multiple entries in one action
You can add several values simultaneously by separating them with commas.
Example input:

Press ENTER to create the entries. Each value is converted into a separate row in the entries table.
The Console will automatically:
- parse the values
- create one row per value
Example result :
If a value already exists in the list, the Console prevents duplicate entries.
Entry Lifecycle (Draft System)
Entry changes follow a draft state model. Nothing is applied until the user clicks Save.
Entries follow a staged lifecycle before becoming active.
Create entry
↓
Draft state (visible in the table)
↓
Save
↓
Active entry
This staged model prevents partial updates and allows users to review all modifications before applying them. Color highlights help users validate pending changes before saving:
- green highlights indicate newly created entries
- red highlights indicate entries marked for deletion
Newly created entries
New entries appear
- green
- with a "+" prefix

Special case : deleting a newly created draft entry
If a user creates a new entry and deletes it before clicking Save, the entry disappears immediately from the table.
It does not appear as a deleted row in red.
This is because the entry was never saved as part of the list. Removing it simply cancels the pending creation.
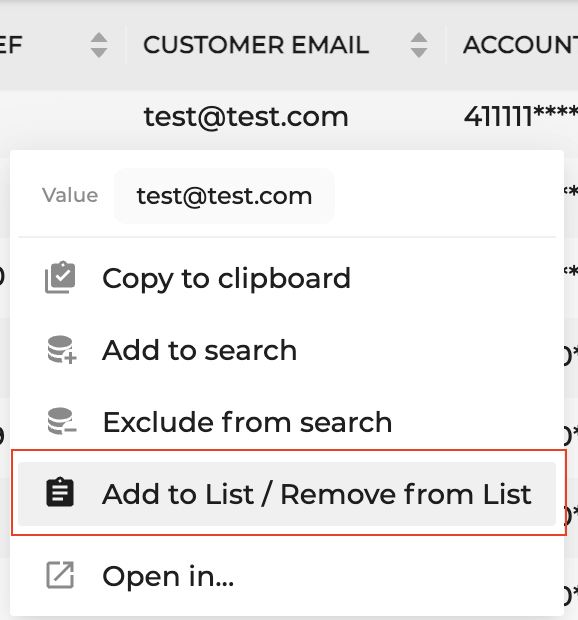
Adding entries from other screens
Lists can also be populated directly from operational data. In modules such as Transactions or Orders, right-click on a value (for example an email, BIN, IP address, or customer ID) and select:
- Add / Remove from Lists
This allows you to add the value to an existing list without leaving the current screen. The system automatically ensures that:
- the list type matches the value
- the list belongs to the same Company
- the user has permission to modify the list
Deleted entries
Clicking the bin icon on the right side of a row marks the entry for deletion.
The row becomes:
- red
- prefixed with "-"

The entry is only permanently removed after clicking Save.
Saving Changes

To persist modifications, click Save.
Once saved :
- pending entries are committed
- pending deletions are executed
The Save button changes to:

Resetting Changes

Click Reset to discard all unsaved modifications.
Reset restores the list to its last saved state.
This cancels:
- newly added entries
- deleted entries
- imported entries
Navigation warning (Unsaved Changes)
If a user attempts to leave the page with unsaved changes, a confirmation modal appears.
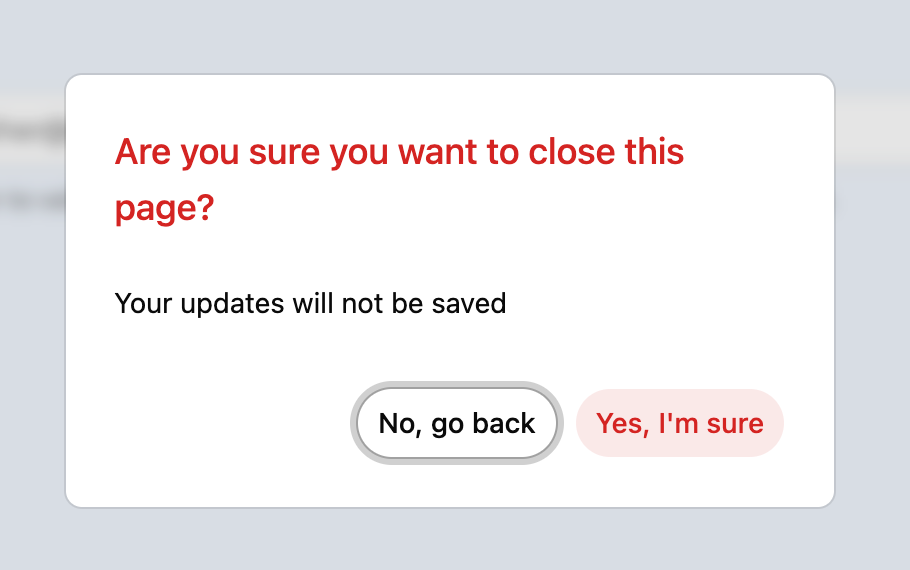
Available actions :
No, go back
Returns to the page.
The user can then :
- Save
- Reset
Yes, I'm sure
Leaves the page.
All pending changes are discarded.
Deleting a List
To delete a list :
- Click on the list you want to delete
- Click on "Edit"
- At the bottom of the page, click on "Delete list"
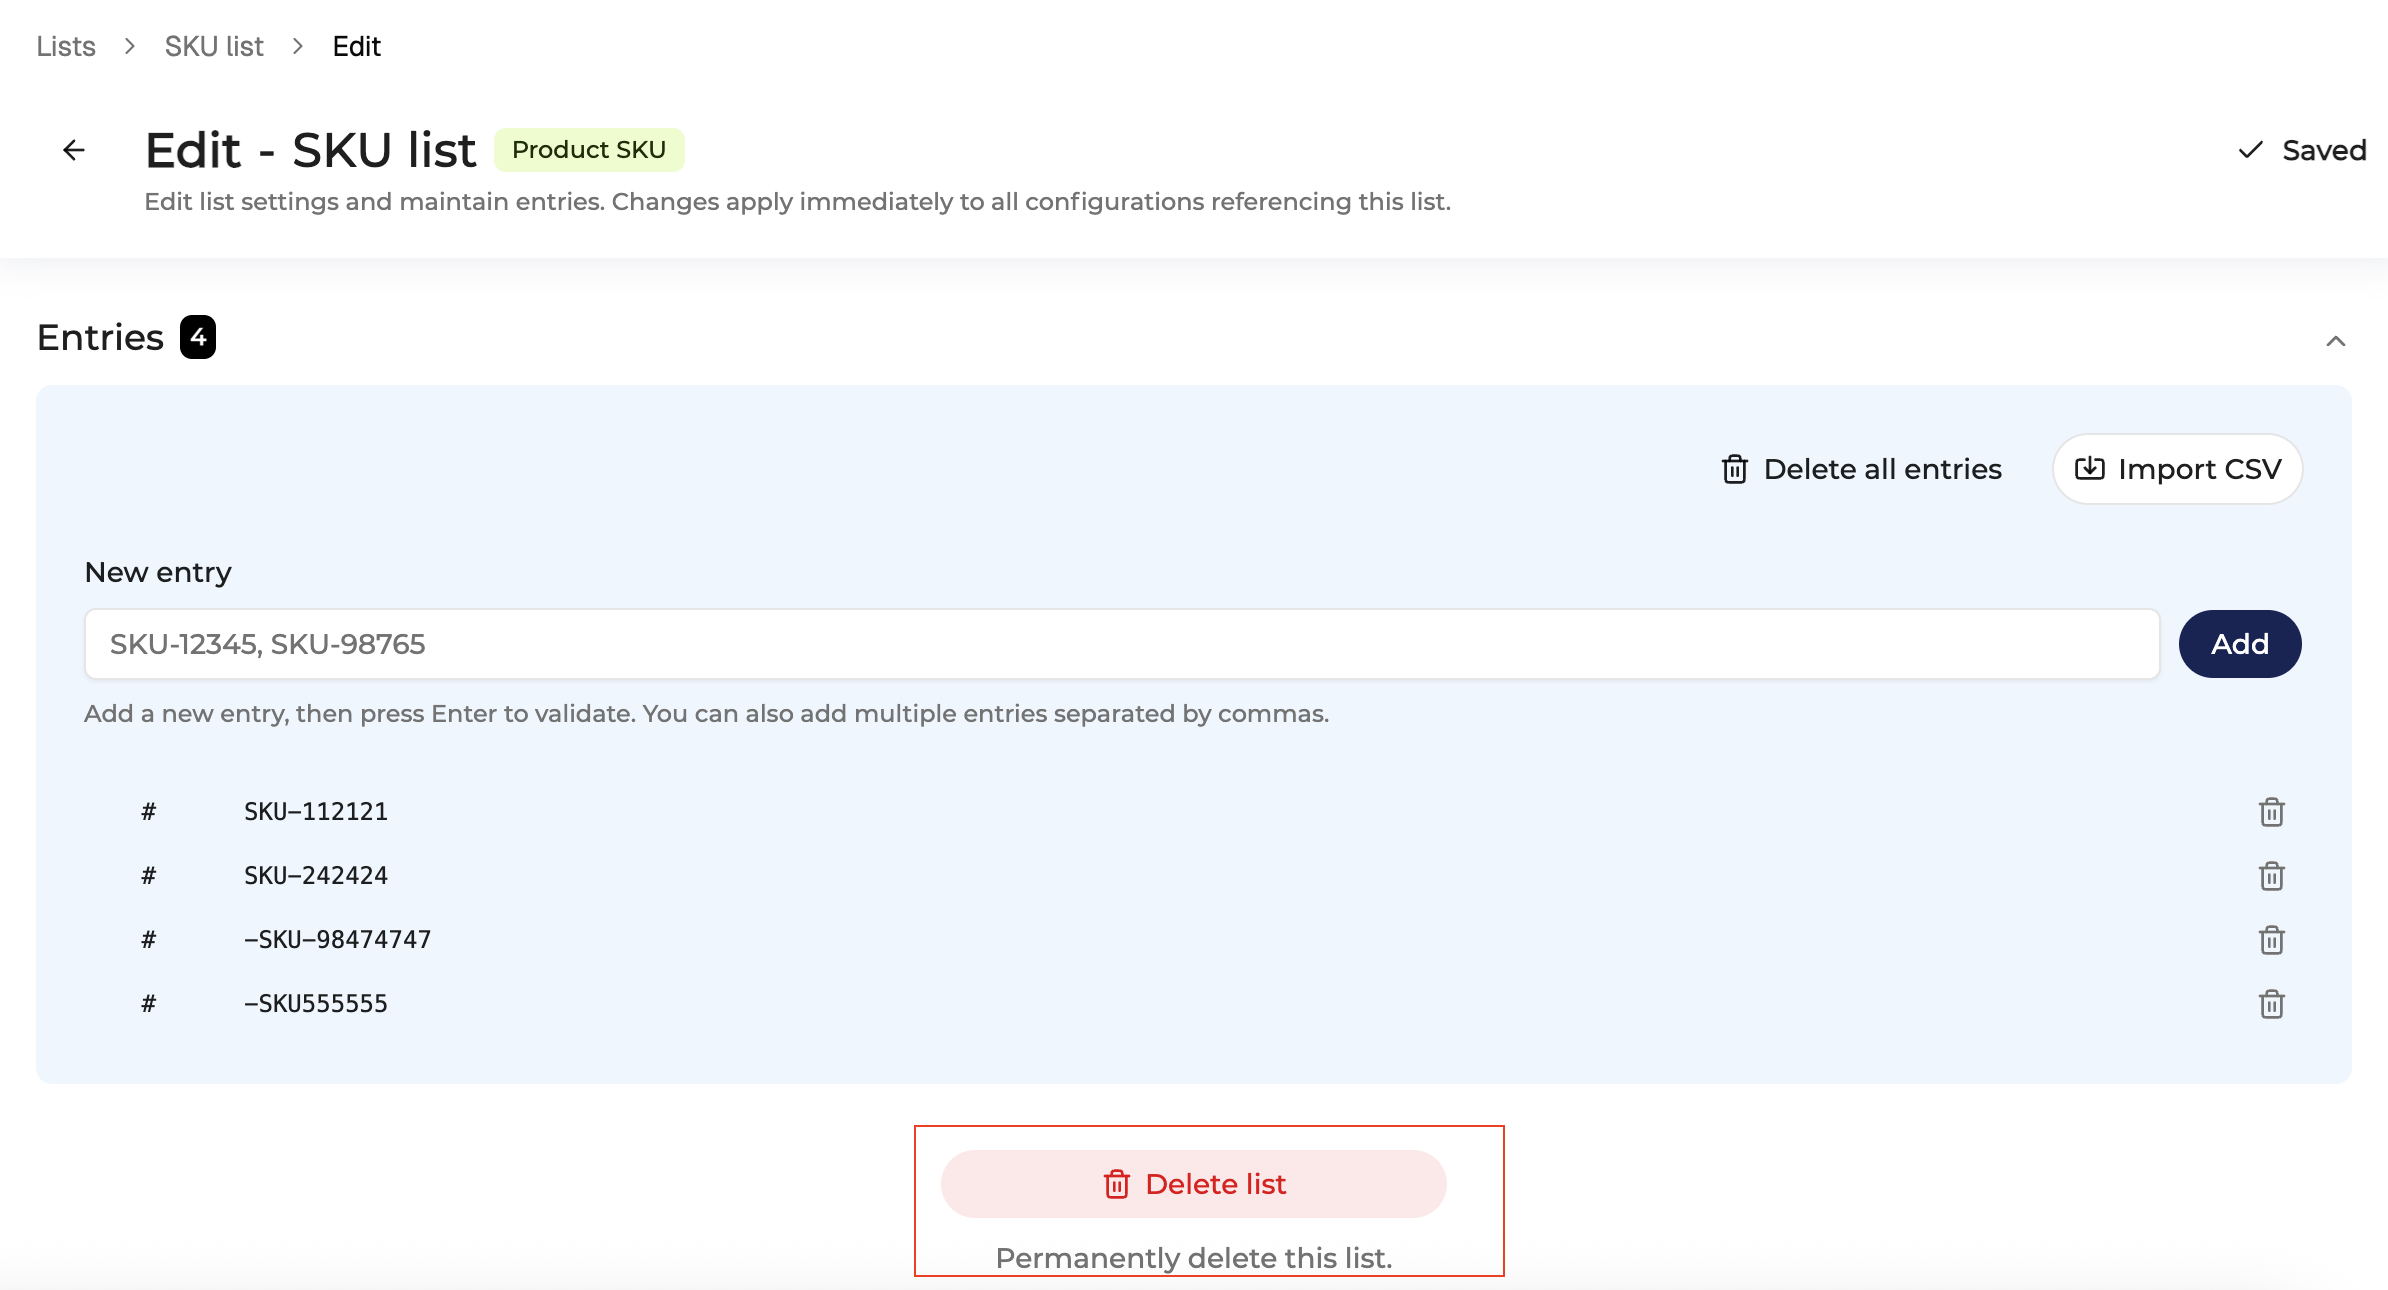
Click Delete list
- Confirm the action in the confirmation modal
The modal displays:
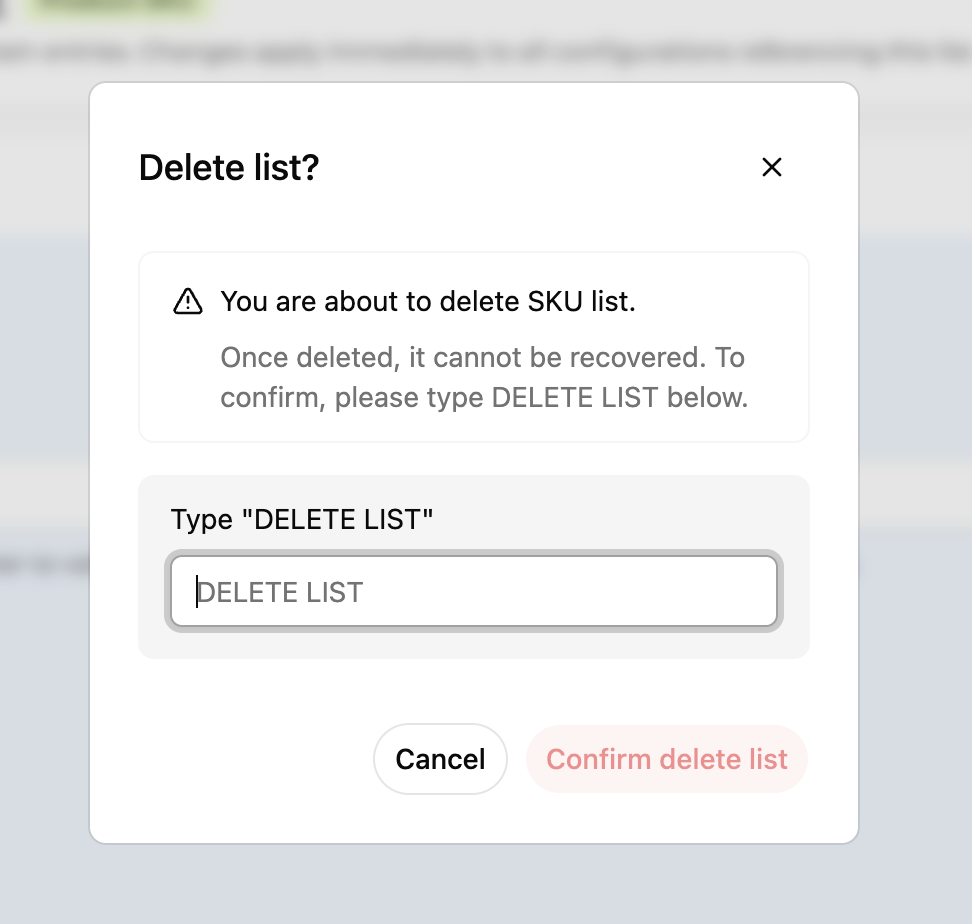
To confirm deletion, the user must type "DELETE LIST"
Then click on "Confirm Delete list"
If confirmed:
- the list
- all entries
are permanently removed.
Updated 3 months ago